Hard to believe it's November already. It's been a busy few weeks around here and the older I get, the faster the months fly by. Finished out 1.5 months of the pantry challenge and spent a little over 20 dollars at the grocery. Not bad. Didn't really make a dent in the pantry either. Did free up lots of freezer space, so there's that. We are also now eating plant based meals every other day instead of just a random time or two each week. Mostly makes me have to become a little more creative with my cooking, but it's definitely healthier. We might actually become vegetarians by the first of next year. Maybe. lol
Temps a little cooler, but then it heats back up again. We're in the mid to high 70's this week. Had some damp and chilly days too, so got to make a nice dairy free Creamy Potato soup for supper one night last week. I'm going to share that recipe so I can send a link to some folks asking for it. This time I used some of my home canned red potatoes that I got from my produce guy's little front yard market, I bought a good sized box from him and canned most of them. I usually can them in big chunks to use for stews and breakfast potatoes, and then pint jars of them diced to use in soups. I also buy fresh potatoes and use them regularly but the price of potatoes has been sky high around these parts the past 4 months. (Like everything). And I like having canned potatoes for back-ups, in case I run out. They worked really well in this soup. I know not everyone cans or likes canned potatoes, so I'll put this recipe the way I make it with fresh potatoes.
Here it is: Creamy Potato Soup. (without the dairy) :)
**ingredient list
Red or Russet potatoes, scrubbed and diced. I use about 6 large potatoes to make soup for 2 with leftovers.
1 nice sized onion, diced
2 stalks celery, washed and diced
1-2 medium sized carrots, scrubbed and diced
2-3 Tablespoons Olive or Sesame Oil (or veg oil, or butter--your choice)
2 quarts vegetable broth (or water)
Sea salt and ground black pepper, and any other seasonings you like in your soup. I like fresh minced garlic in it.
A dash of liquid smoke (optional) I use it because it gives an illusion of bacon or ham in the soup.
1-2 cans Cannelini beans or Navy beans
I use my instapot to make most soups these days. I have a gas range and the price of propane is thru the roof, so I use it as little as possible. With the InstaPot on the brown/sear setting, put your oil, onions, celery and carrots in and sweat them well. After about 15 minutes, add the diced potatoes. Add the minced garlic and seasonings and mix it well. Add the broth or water and make sure you have enough to cover the vegetables. If you need to, add more. Set it on the soups/stews setting and let 'er go. It usually takes about 20 minutes to cook the carrots and potatoes through. Depends on how small you diced them. I always put these vegetables in my potato soup because it's added nutrition and it looks pretty. lol
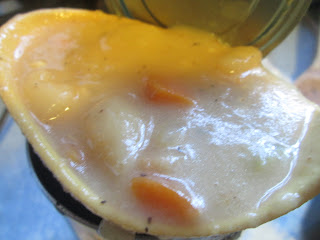
When the vegetables are done to your satisfaction, put the can(s) of beans into your blender, liquid and all. Add a couple of ladles of your soup to it and blend until smooth. Stir this into your pot of soup. If it's too thick, add a little water. If it's too thin, add more beans. But this should be just about right. Taste it and add more salt if needed. We don't use milk, but we do use butter, I will sometimes put a spoonful of butter into it at this point. It makes a really nice silky creamy soup. Serve it with some yeast rolls or buttery crackers or whatever you feel like.
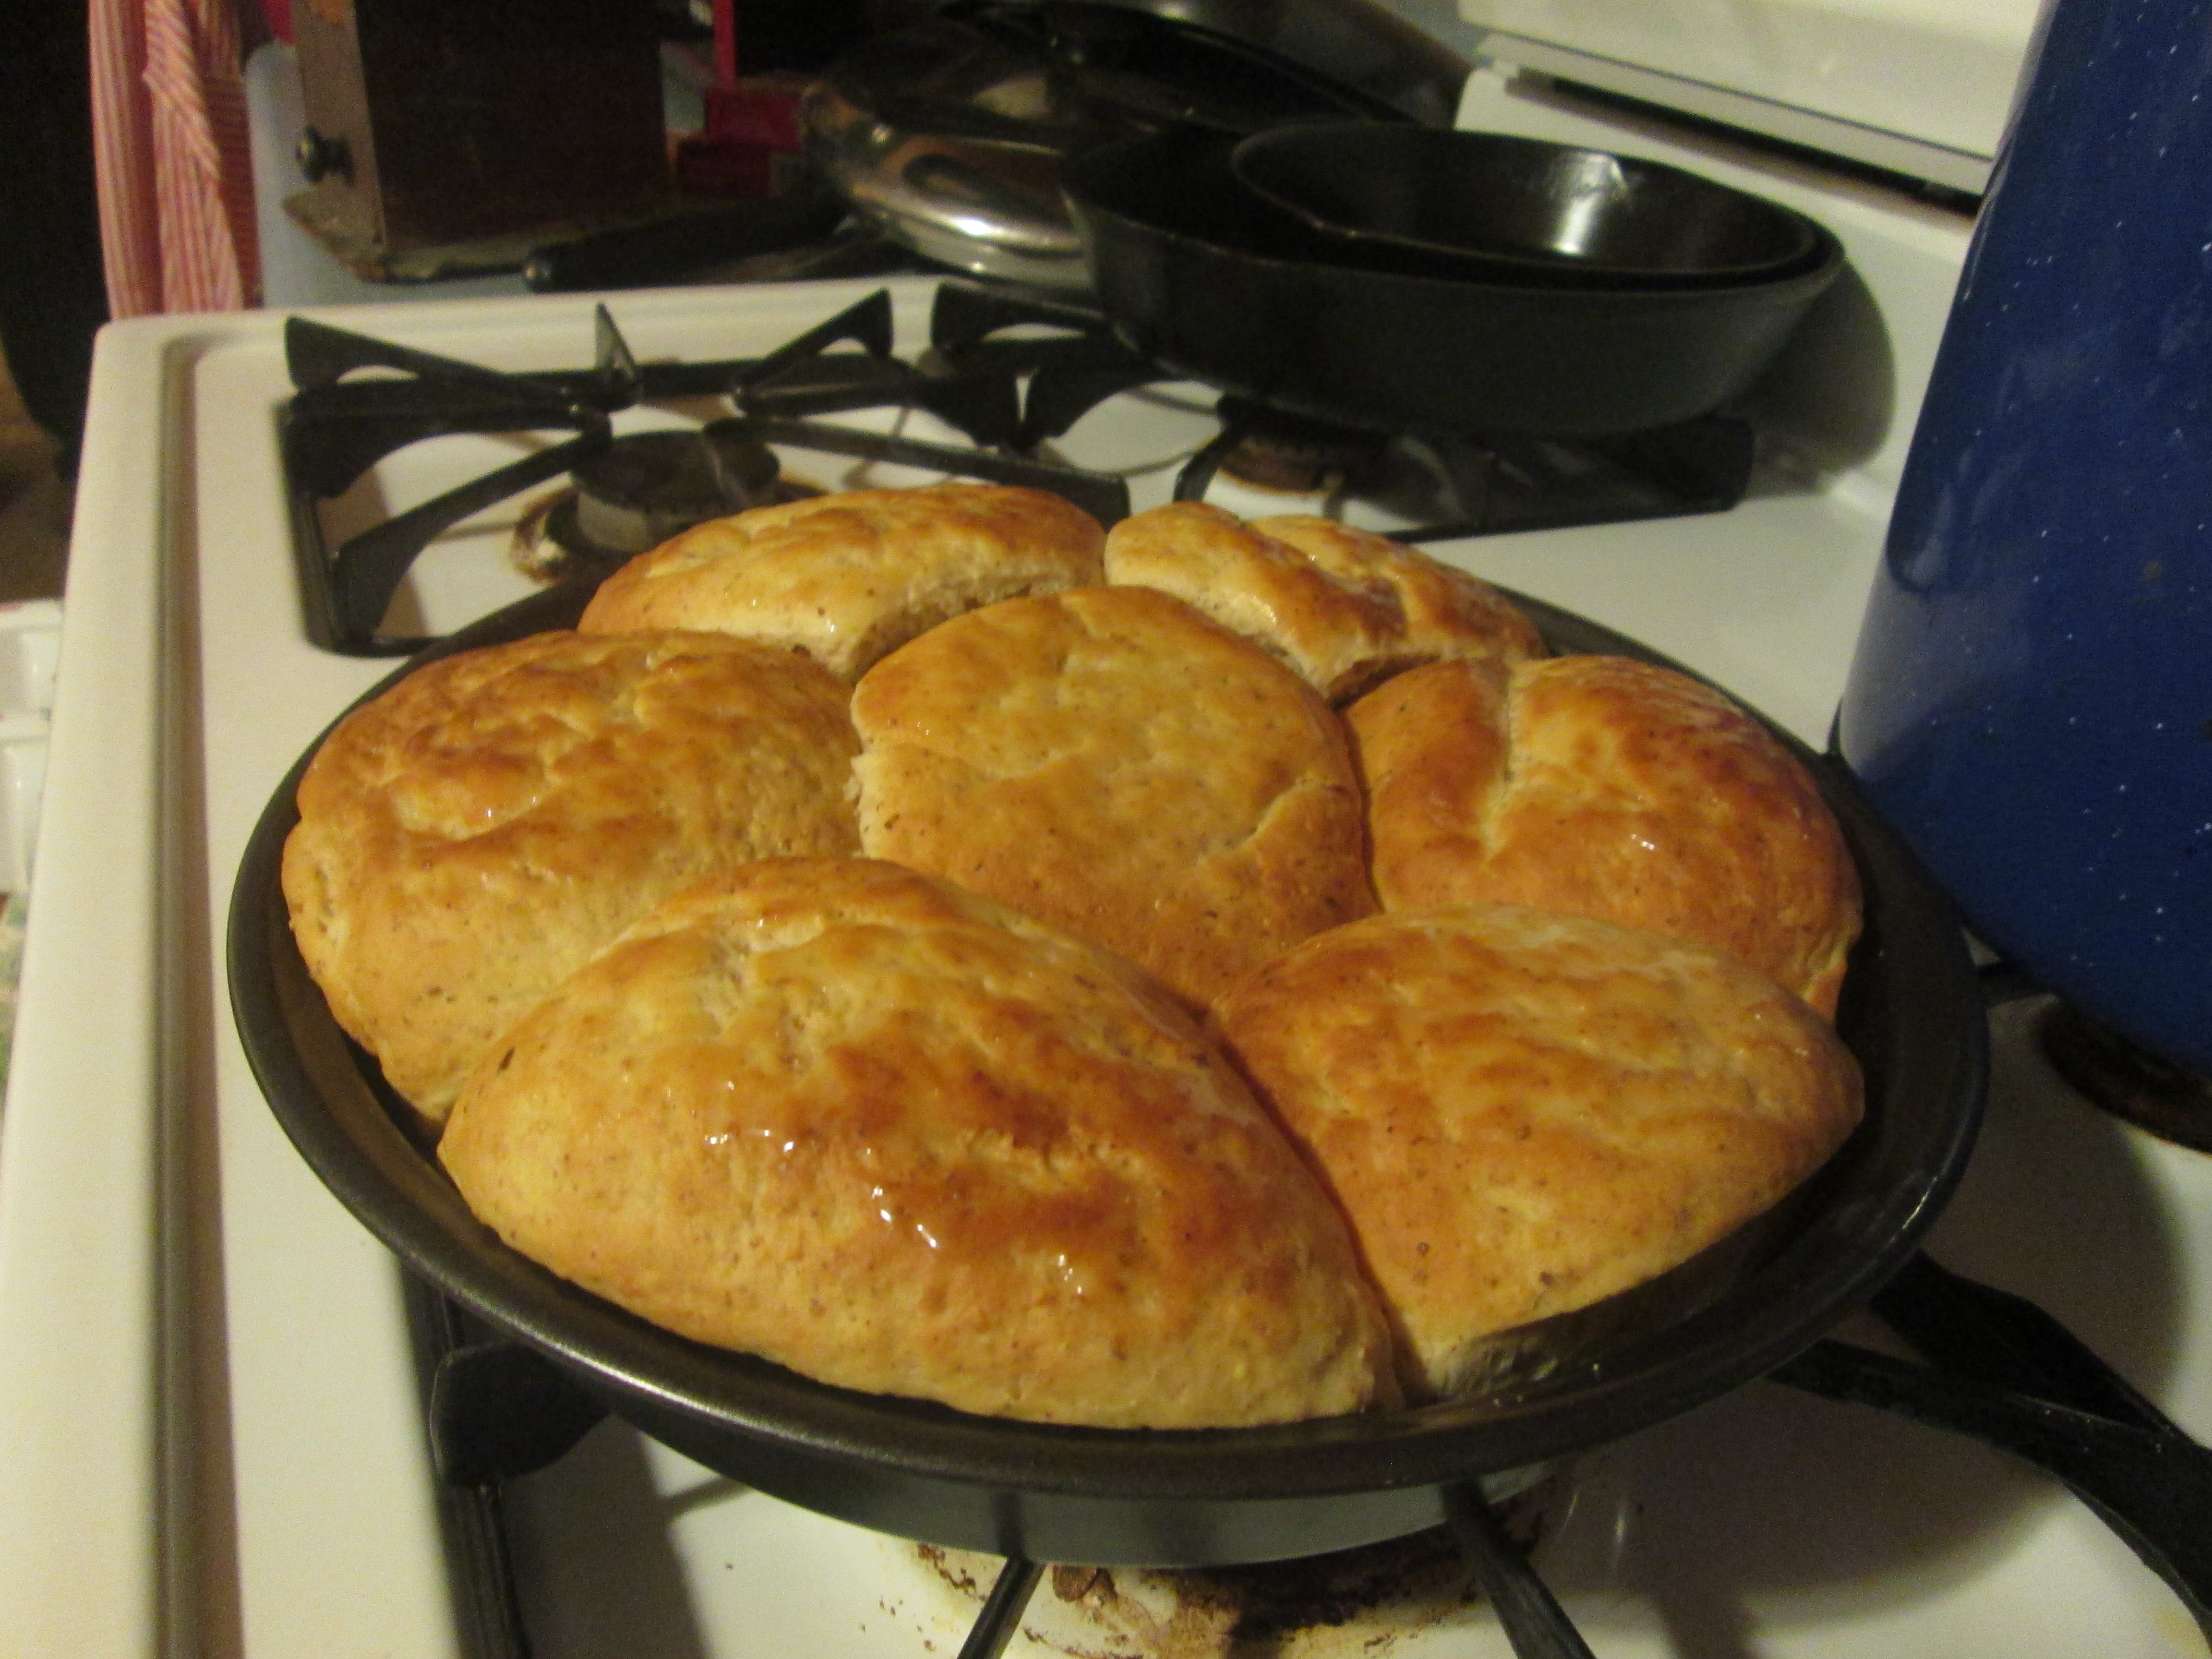
These are 30 minute yeast rolls that I baked in my Ninja Foodi Grill.
Hope you enjoy-- Bon Appetit !